Getting Started
Account Creation
- Go to https://schedulearn.com
- Click Sign Up in the top right, or go directly to https://app.schedulearn.com/dashboard/register
- Enter your details and click Sign Up
-
Check your email for a verification link and click it
Note
If you don’t see the email, check your spam/junk folder.
-
Once verified, log in at https://app.schedulearn.com/dashboard/login
Logging In for the First Time
When you log in for the first time, you’ll see a modal showing the latest updates to ScheduLearn. Click Let’s Go! to close the modal and begin.
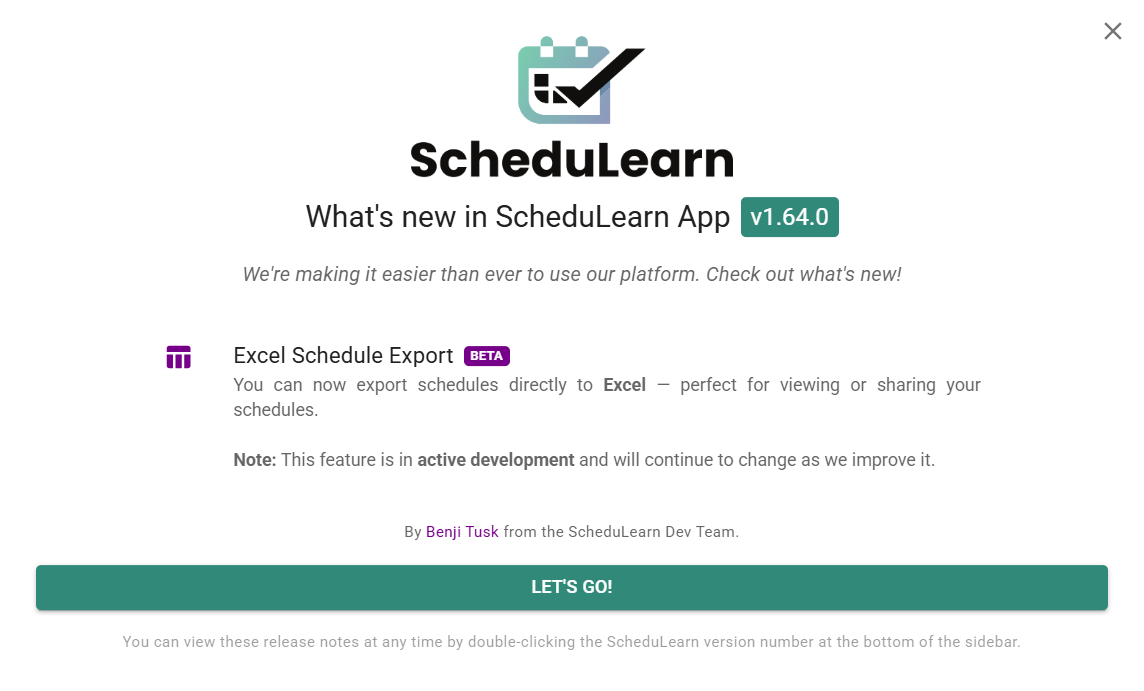 Figure 1: The “What’s New” modal shown on first login.
Becoming Familiar with the Website Layout
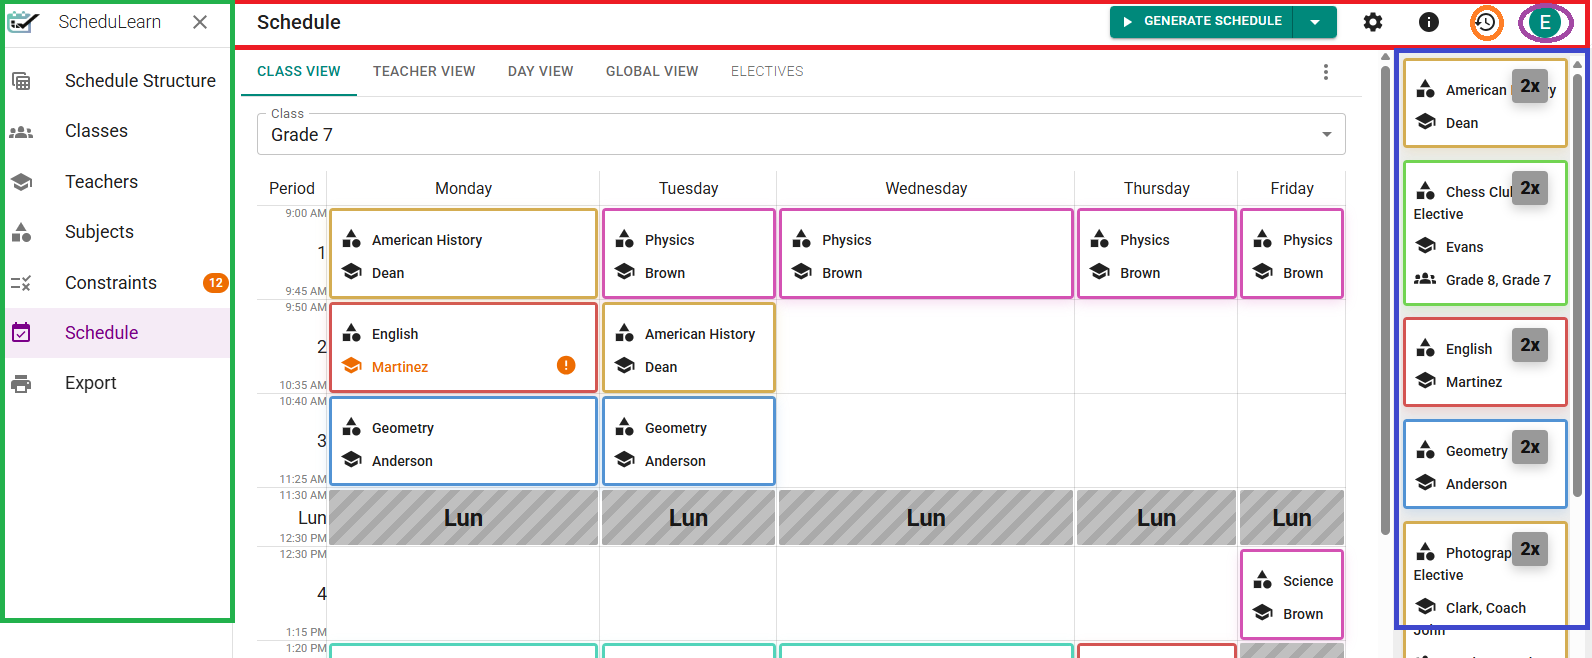 Figure 2: Overview of the ScheduLearn layout.
Throughout this guide, we’ll refer to the following terms:
- Toolbar → The red bar on the top in Figure 2. Contains tools and actions relevant to the current page.
- Account Menu Button → The rightmost button on the toolbar (circled in purple). Access your profile or log out.
- Navigation Sidebar → The green panel on the left. Use it to navigate between pages.
- Version History Button → The toolbar button circled in orange. Opens the version history drawer (see Version History).
- Info Button → The toolbar button to the direct left of the version history button. Every page contains this button and will link to relevant tutorials to its page.
- Staging Area → The blue panel on the right (only on the Schedule Page). Displays unplaced lessons in the current view.
✅ You can collapse or expand the sidebar. We recommend keeping it open while you’re getting familiar with each page—later, closing it gives you more workspace.
🕓 Version History
ScheduLearn automatically saves your work as you go. The Version History feature lets you: - Save drafts as specific checkpoints - Revert to an earlier version if needed
 Figure 3: The Version History button (circled in blue).
Click the Version History button on the toolbar to open the drawer (Figure 4).
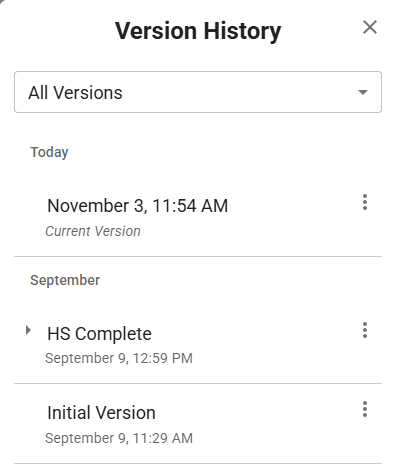 Figure 4: Version History drawer.
Naming and Saving Versions
ScheduLearn automatically creates versions as you work, labeled by time. To manually save a specific point in time:
- Double-click a version’s name, or
- Click the ⋮ (three dots) menu → Name Version
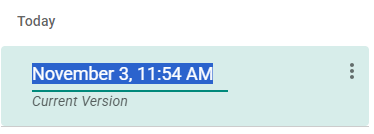 Figure 5: Naming a version manually.
Your named version is now saved and can be restored anytime.
If you can’t find a version, expand the relevant section (blue arrow in Figure 6) or filter for named versions using the dropdown (red arrow).
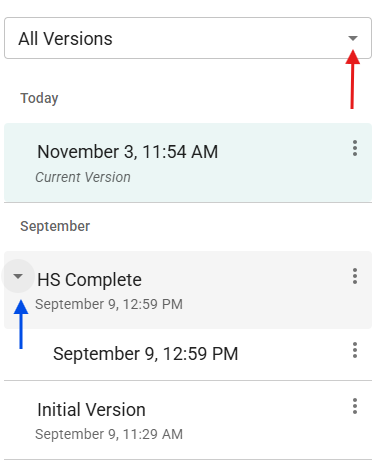 Figure 6: Expanding and filtering version lists.
Restoring a Version
To restore a previous version: 1. Click the ⋮ (three dots) menu beside the version 2. Choose Restore this version
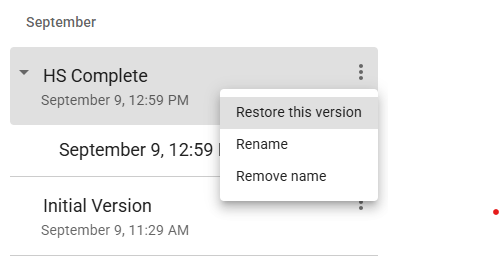 Figure 7: Restoring a version.
When you restore, ScheduLearn automatically creates a new version first—so you’ll never lose your current work.
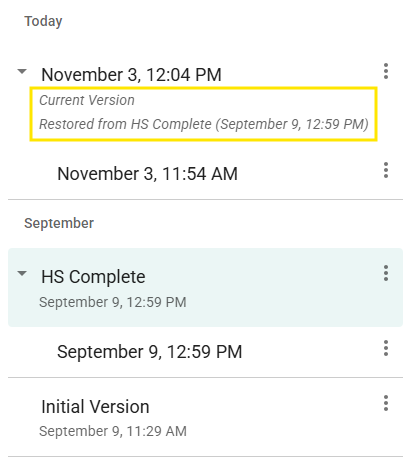 Figure 8: After restoring the version “HS Complete,” the current version becomes an exact copy.
Version Tags
Some versions include automatic tags such as “Schedule Exported” or “Schedule Generated.” ScheduLearn automatically saves tagged versions whenever you generate or export a schedule to help you track key milestones.
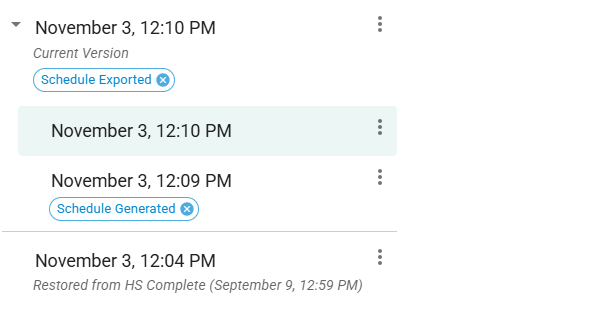 Figure 9: Automatically tagged versions.
Go to the next section: Building your Schedule Structure