Classes
Classes are essentially groups of students. Note that classes are not subjects — subjects are the actual lessons taught, while classes are the groups of students who take those subjects.
You might create a class for each homeroom, subdivision, or grade in your school. ScheduLearn will generate an independent schedule for each class.
Because classes allow for tracked subjects (simultaneous subjects such as levels or electives), there is often more than one way to separate your classes. If you’re unsure how to divide them, err on the side of creating a broader class — for example, the entire grade rather than separate sections like 9A and 9B.
Tip
When getting started, create just one or two classes and generate a full schedule for them. This helps you get comfortable with the software before adding more classes.
Adding a Class
Click the Add Class button on the toolbar of the Class Page.
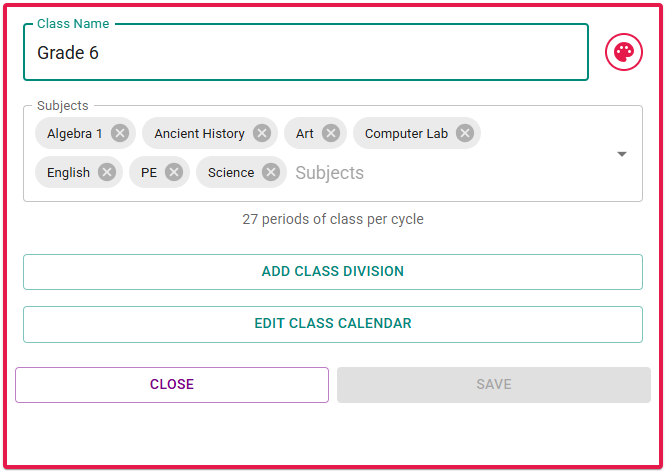 Figure 1: The Class Card used to create or edit a class.
- Class Name: The name displayed in the schedule.
- Color Picker: You can modify the class color.
- Subjects: All subjects that any student in the class might take. You may not see this field initially if no subjects have been created yet. Typically, you’ll assign subjects to classes while creating the subjects themselves, but you can modify from either end.
- Schedule Structure: If you have multiple schedule structures enabled, you’ll see a selector to choose which structure the class belongs to (see Figure 2).
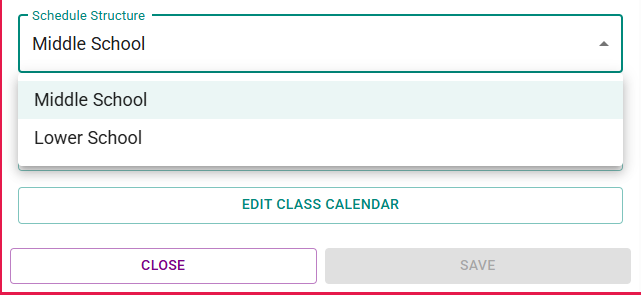 Figure 2: Selecting the schedule structure for a class.
Class Calendar Constraints
On the Schedule Structure page, you can block specific time slots (e.g., days off or periods with no classes). However, those blocks apply to all classes in that schedule structure.
If you only want to block time for a specific class, modify its class calendar. For example, if 6th grade ends one period earlier than 7th/8th, don’t block that period on the schedule structure — instead, block it directly on the 6th grade class calendar.
Click Edit Class Calendar to open the modal (Figure 3).
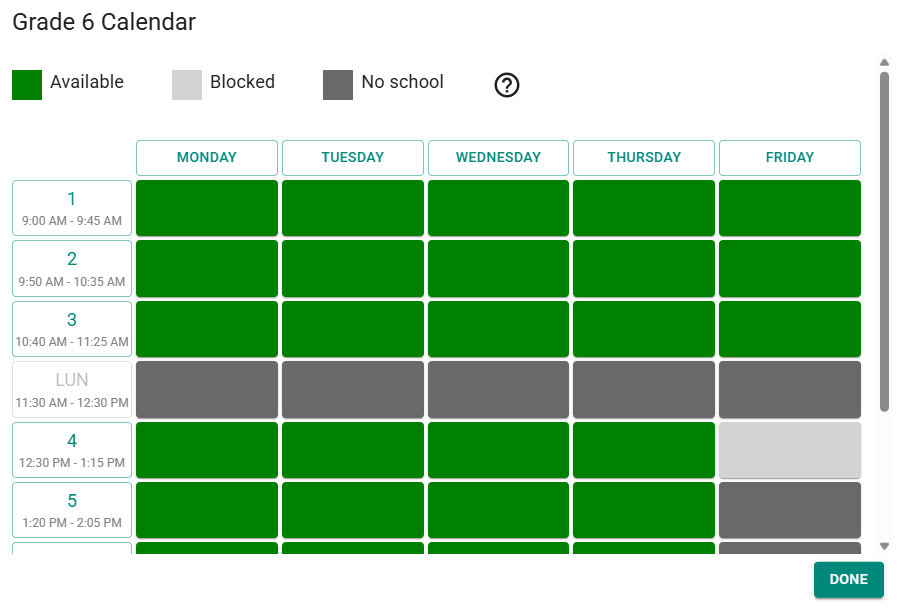 Figure 3: Editing a class calendar to block time for specific classes.
Block the desired times, then click Done and Save the class.
Tip
You can toggle an entire day or period by clicking its label.
Class Divisions
Class divisions allow you to define tracked groupings within a class — for example, different levels, homerooms, or elective groups.
A division is made up of two or more tracks, each containing one or more subjects. Students belong to one track per division.
Example (Figure 4):
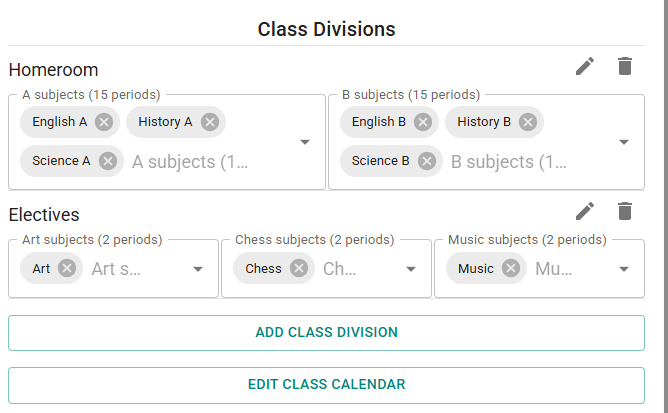 Figure 4: Example of class divisions with multiple tracks per division.
Here, there are two divisions: Homeroom and Electives.
- The Homeroom division has two tracks: A and B, each with three subjects. Students in Track A take all of A’s subjects; students in Track B take all of B’s.
- The Electives division has three tracks, each with only one subject. This is a simple example, because the only way to satisfy this division is to have Art, Chess, and Music all at the same time.
The scheduler can place subjects in one track at the same time as any other track (since no student takes subjects between tracks) unless a shared teacher or other constraint prevents it.
This allows the solver to explore every possible subject pairing.
Note
Tracks within a division must have the same total number of lessons. For example, one track might have one 4-lesson subject, while another has two 2-lesson subjects.
Creating a Division
Click Add Class Division (Figure 5).
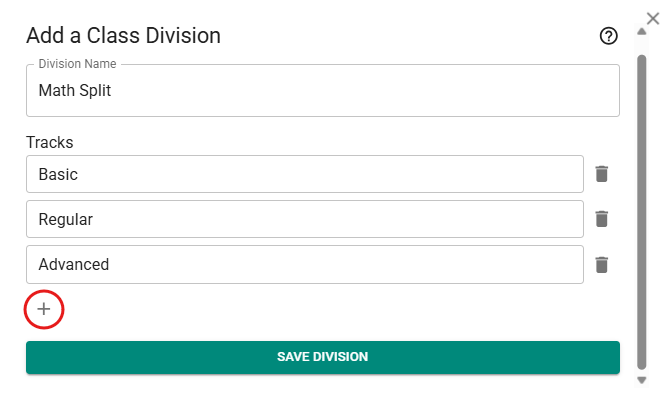 Figure 5: The Add Division modal used to create class divisions and tracks.
- Enter a name for the division.
- Add tracks by naming them and clicking the + icon to add more (circled in red in Figure 5).
- Click Save Division.
You’ll now see the division with its tracks listed. Select the relevant subjects for each track directly from the class card.
To edit a division, click the pencil icon. To delete it, click the trash icon.